
Swanky Amp, version 2
Swanky Amp manual
This manual covers installing Swanky Amp, then every part of the window and what each control does to the sound.
Installing
There is one installer for macOS and one for Windows. Each installs Swanky Amp as a VST3 plug-in, a CLAP plug-in and a standalone application; the macOS installer also installs it as an Audio Unit, for Logic Pro, GarageBand and other hosts that load Audio Units.
The macOS installer runs on Apple silicon and Intel Macs with macOS 11 or later. The Windows installer is for 64-bit Windows 10 or later.
Download the installer for your computer from the downloads page, run it and follow its prompts. If your host was open while you installed, ask it to rescan its plug-ins. The plug-in appears in your host as Swanky Amp 2.
Alongside version 1.4
Version 2 is a separate plug-in, so it installs beside 1.4 rather than replacing it. Projects saved with 1.4 keep opening in 1.4. To move a song across, put version 2 on the track and dial the sound in again, or start from a factory preset.
Version 2 corrects parts of the amp model, the tone stack above all, so the same settings do not sound quite the same in both. Keep 1.4 installed if you want its exact voicing.
Presets you saved in 1.4 come across by themselves: see Presets from version 1.4.
Mono and stereo tracks
Swanky Amp works on mono and stereo tracks. On a stereo track each side runs through its own amp, both set by the same controls, so a stereo part keeps its width. On a mono track it runs a single amp.
The standalone application
The standalone application runs the same amp without a host. The panel the information button opens chooses the input, its channels and the output, as the Settings menu does. Choose the device your guitar is plugged into under Input. The amp reads the input's first channel, so if your guitar is on another, choose it under Input channels. These choices are remembered on your computer.
The first time the application opens, and whenever the input it remembers is not connected, the input is off and the panel opens by itself to ask for one. Choosing an input turns it on. While the input is off, the Input knob reads OFF, and pressing the knob opens the panel. If you choose the computer's own microphone, the panel warns that it will feed back through its speakers: use headphones. That microphone is not remembered, so the next time the application opens it asks again.
The window
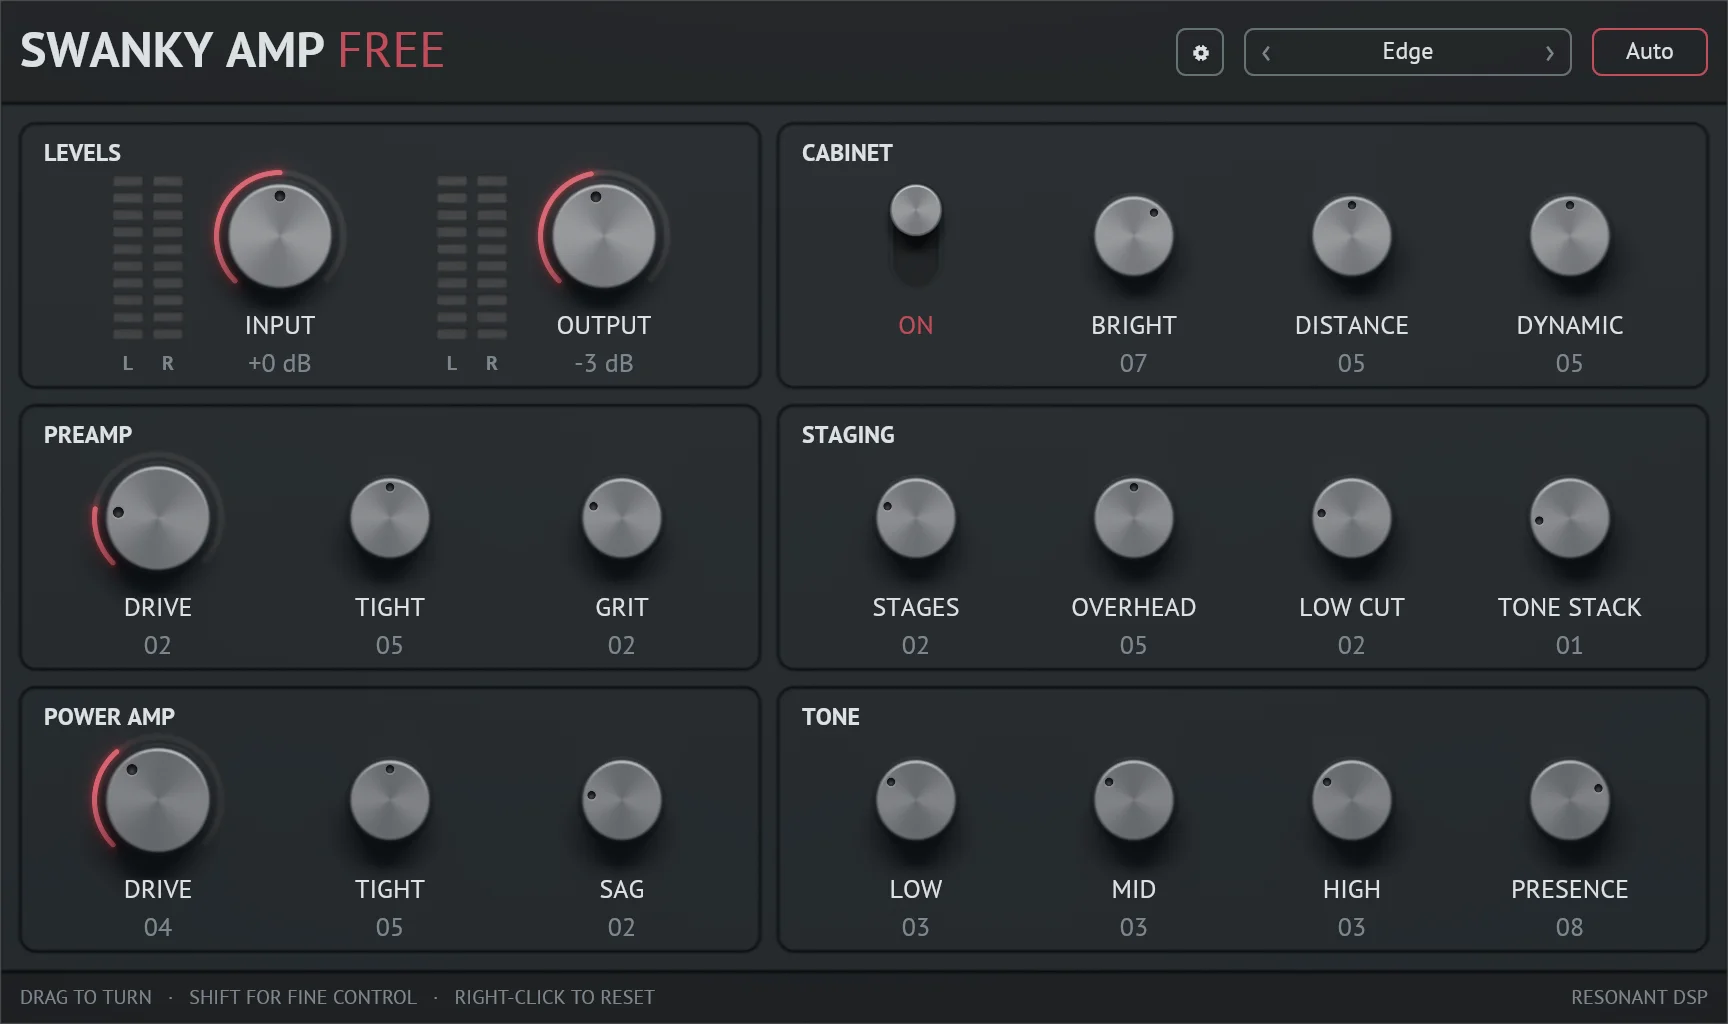
The window has three parts. The header along the top holds the presets and two buttons. Below it, the controls sit in six groups: Levels, Cabinet, Preamp, Staging, Power Amp and Tone. The line along the bottom lists the knob gestures.
Knobs and gestures
Drag a knob up to turn it up and down to turn it down. Hold Shift while dragging for fine adjustment. Right-click a knob to put it back to its default.
The mouse wheel turns a knob too. Click a knob and the arrow keys step it, while Home and End jump to either end of its range. Shift makes the wheel and the keys finer as well.
Each knob shows its value under its name: decibels for Input and Output, 1 to 5 for Stages, and 0 to 10 for the rest. The readout shows whole numbers, and one decimal place while you drag, so fine adjustments stay visible. The large knobs, Input, Output and the two Drives, carry a rose ring that lights up as far as the knob is turned.
Every control is a host parameter, so your host can automate it.
The header
From left to right, the header holds the name, the information button, the preset field and the oversampling button.
Presets
The preset field shows the current preset's name. The arrows either side of it load the preset before or after the current one, stepping through the factory presets and then your own. A dot after the name shows that the preset has changed since you chose it.
Press the name to open the preset menu. It lists Init first, then the ten factory presets, then your own, followed by these actions:
- Save
- Saves your changes over the current preset. It is available once one of your own presets has changed. Factory presets cannot be overwritten; save a copy with Save as… instead.
- Save as…
- Saves the current sound as a new preset. A file dialog asks for its name. The preset is always saved in your preset folder, so the menu lists it.
- Remove
- Deletes the current preset, if it is one of your own. The sound stays as it is and the field goes back to Init.
- Import 1.x presets
- Copies your presets from Swanky Amp 1.4 again. See Presets from version 1.4.
- Open folder
- Opens your preset folder in Finder or Explorer. Rename presets there.
Choosing a preset goes through the host, so automation and undo see it, and a reopened project shows the preset's name again.
A preset holds the tone. The Input level and the cabinet switch stay with the project, as they did in 1.4, because they depend on your guitar and on what follows the plug-in rather than on the sound: a preset stores them, but choosing one leaves them as they are. Oversampling stays with the project too.
Init puts every tone control back to its default. There is no separate reset button.
The factory presets all play at the same loudness, so stepping through them compares tone rather than level.
Your presets are files ending in .xml, one per preset, in the same format as version 1.4, which can load them too. On macOS they live in ~/Library/Audio/Presets/Resonant DSP/Swanky Amp 2, and on Windows in %APPDATA%\Resonant DSP\Swanky Amp 2. A file that cannot be read is left out of the menu, and the line at the bottom of the window names it. So is a file saved by version 1.4 and placed in this folder by hand: bring it in with Import 1.x presets instead, which converts it.
Presets from version 1.4
The first time version 2 runs, it copies your presets from Swanky Amp 1.4 into its own preset folder. Your 1.4 preset files are never changed.
Each copied preset keeps its name and its settings, except Low, Mid, High and Presence. Those are converted toward the 2.0 voicing, for the corrected tone stack, and a converted preset may still differ a little from the original. Copied presets keep the Output level you gave them.
A preset whose name is already taken in the version 2 folder is left alone, and so are unchanged copies of the 1.4 factory presets, since version 2 carries those already. Import 1.x presets in the preset menu repeats the copy whenever you like.
Oversampling
Distortion creates harmonics above the range of hearing. At the host's own sample rate some of them fold back down as a harsh fizz that is out of tune with the note. Running the tube stages at a higher internal rate keeps those harmonics out of the way. That is oversampling.
The button at the right of the header sets it. Click to cycle through Auto, 1×, 2× and 4×. Auto is the default: it runs the tube stages at twice the project rate at 44.1 and 48 kHz, and at the project rate itself at 88.2 kHz and above.
Once the host has started the audio, the button shows the factor in use, such as Auto 2×. A fixed setting never runs the tubes faster than about 192 kHz, so 4× in a 96 kHz project runs at 2× and says so. The outline dims when the tubes run at the host's own rate.
Oversampling delays the sound slightly, by 32 samples at 2× and 48 samples at 4×. The plug-in reports the delay to your host so it can compensate.
On a heavily loaded computer 1× saves the most processing power, at the cost of some fizz on high-gain sounds at 44.1 or 48 kHz. Oversampling is saved with the project, not with presets.
The information button
The button left of the preset field shows a cog. Pressing it opens a small panel with the version of Swanky Amp you are running and links to the Swanky Amp page, this manual and support. Press Escape, the button again or anywhere outside the panel to close it.
Interface size scales the whole window, with all its controls and text, to 75, 100, 125 or 150 %. The size is remembered for this computer, and is not saved with presets or projects.
Copy diagnostics puts a short summary on the clipboard to paste into a support request: the version you are running, your operating system, the host and plug-in format, the sample rate and buffer size, and the licence. Nothing is sent anywhere.
Third-party licences opens a text file with the licences of the open-source components Swanky Amp includes.
When you open the window, at most once a day, Swanky Amp asks resonantdsp.com whether a newer version has been released. If one has, the cog becomes a download arrow with a rose outline, and the panel names the new version with a Download link to the Swanky Amp page.
The request carries no identifier for you or your computer and no usage data. When you are offline nothing happens.
Levels
The Levels group sets how loud your guitar arrives at the amp and how loud the amp leaves the plug-in, with a meter beside each knob.
The meters
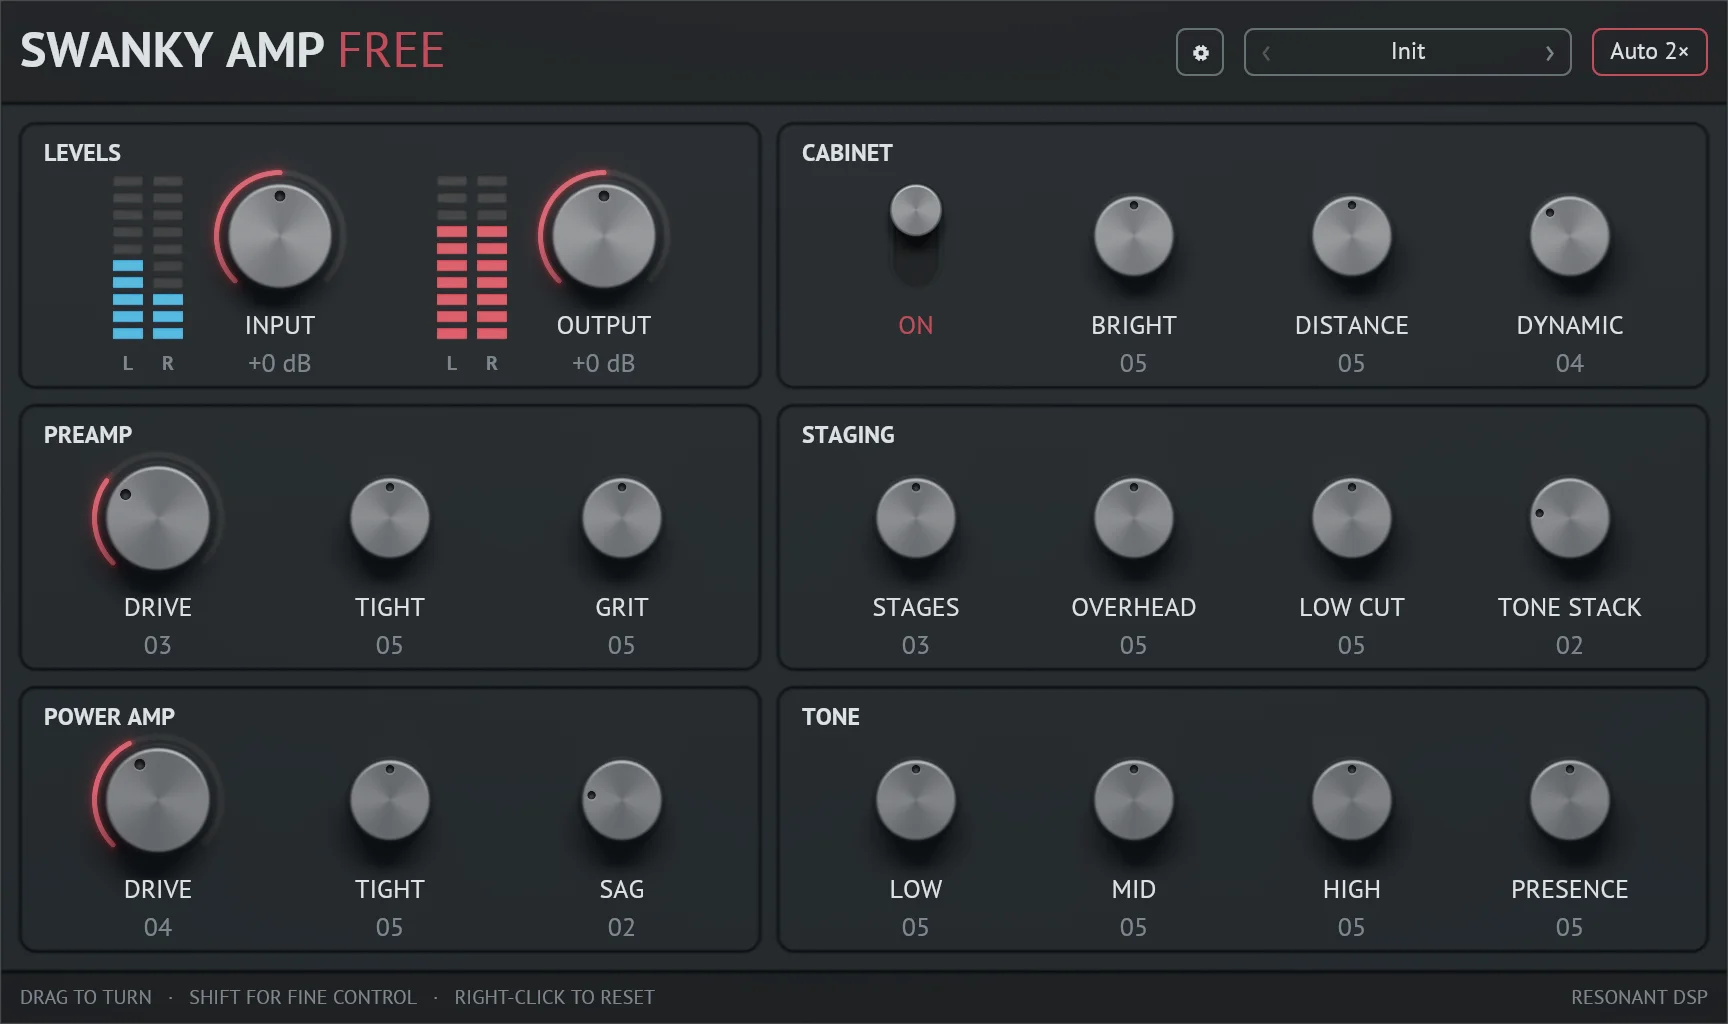
Each meter has ten cells in a left and a right column: blue for the input and rose for the output. They light instantly and fall back over about half a second. On a mono track both columns show the same.
The input meter reads your guitar after the Input knob, from −26 to +8 dBFS, so each cell is 3.4 dB. A light strum should peak about one third of the way up with a single-coil pickup, and about two thirds with a humbucker. The output meter reads what leaves the plug-in, after the cabinet and the Output knob, from −60 to 0 dBFS, so each cell is 6 dB and the top one lights above −6 dBFS.
The meters go dark while the window has lost the keyboard focus and the pointer is somewhere else, which saves processing power. The sound does not change.
Input and Output
- Input
- The level of your guitar into the amp, from −35 to +35 dB. As with a real amp, the sound depends strongly on it. Set it so your guitar lands in the reference range: strum lightly and watch the input meter. With a single-coil pickup, set Input so the strum peaks about one third of the way up. With a humbucker, set it to peak about two thirds of the way up. Set it before you work on a tone, and again when you change guitars. Presets do not change it.
- Output
- The overall output level, from −35 to +35 dB. It works like a fader after the amp and does not change the distortion.
The Drive knobs and Grit compensate their own level, so you can set the tone first and the output level last.
Setting the levels
- Strum lightly and set Input so the input meter peaks about one third of the way up for a single-coil pickup, or about two thirds for a humbucker.
- Drive the preamp or the power amp for the distortion you want. Each Drive changes the tone without changing the overall volume.
- Then set Output as you like for monitoring or gain staging. It does not change the distortion.
The amp
The Preamp, Staging, Power Amp and Tone groups hold the two halves of a tube amplifier and the tone stack between them.
A tube amp has two sets of tubes that break up in different ways. The preamp tubes break up abruptly: hit the strings hard and the attack crunches, then the note cleans up as it decays. The power amp tubes break up gradually, with compression, sag and note bloom, the swell of a note as its distortion eases.
Both Drive knobs compensate their own level, so turning one up changes how much the amp distorts rather than how loud it is. Grit does the same.
Preamp
- Drive
- How hard the preamp tubes are driven. This is the amp's gain.
- Tight
- How quickly the tubes recover from a large signal. Turn it up for a tighter, cleaner distortion, down for more touch sensitivity.
- Grit
- How much headroom the tubes have. Turn it down to take harsh artefacts out of the distortion, up for a heavily overdriven sound.
Staging
- Stages
- The number of preamp tubes, from 1 to 5, blending between them at the settings in between. Each tube is voiced differently, so the number of stages can bring out more low end or a tighter distortion.
- Overhead
- How much the later preamp tubes distort. Turn it down for a high-gain sound.
- Low Cut
- How much low end the preamp cuts. Turn it up to take out bass, down for a fuller distortion.
- Tone Stack
- Blends between three tone stack circuits: 0 scoops the low mids, 5 emphasises the upper mids, and 10 is a bright circuit with a scoop. Settings in between blend neighbouring circuits.
Power Amp
- Drive
- How hard the power tubes are driven. This is the amp's volume, with its level compensated.
- Tight
- How quickly the power stage recovers. It sets how fast the sag compression takes hold and lets go.
- Sag
- How far the power supply sags under a big note: a compression with a character of its own. Turn it up for a more compressed sound. It is most audible with the power amp Drive high, and less so when the preamp is driven hard.
Tone
The tone stack sits between the preamp and the power amp, so it shapes what the power tubes distort. With the power amp driven hard, these knobs change the character of the distortion as well as its balance.
- Low
- The bass going into the power amp. Up for a fuller sound, down for more definition and brightness.
- Mid
- The mids going into the power amp. Up for a punchier, more aggressive tone, and for more sustain with the power amp driven.
- High
- The top end going into the power amp. Up for a brighter tone, down to calm harsh distortion.
- Presence
- The upper mids. Up for more definition and detail, down to take away brittle harshness.
The cabinet
The cabinet turns the amp's raw, harsh output into the sound of a guitar speaker in front of a microphone.
- The switch
- Turns the cabinet on and off. Up is on, and the label under it says ON or OFF. Press anywhere on it to flip it; right-click puts it back on. Turn it off when a cabinet plug-in or an impulse response loader follows Swanky Amp. Like Input, the switch stays with the project: choosing a preset leaves it as it is.
- Bright
- Moves the microphone in a way that sets the overall brightness of the sound.
- Distance
- How far the microphone sits from the speaker. Further away takes out some lows and upper mids, for a clearer sound.
- Dynamic
- How much the speaker's response follows the loudness of the signal. Turn it up to darken the distortion while leaving quiet parts as they are.
Bright, Distance and Dynamic shape the built-in cabinet, so they have no effect while it is off.
 ASIO is a registered trademark of Steinberg Media Technologies GmbH.